Cyanotype Dry Method Instructions
✿✿✿
Making a test strip before getting started with printing can be helpful with determining the sun exposure time.
Gather your paper. You can cut the paper to a size you want the final image to be. Or you can use a full sheet bigger than your final size and cut after printing. Another option is the edge of the paper. You can cut it with scissors/paper cutter for a straight edge or tear it for a deckled edge. Since the paper will be left to dry, you can make as many papers for printing as you like. Unused paper can be stored in a sealed lightproof/black bag for future use.
Gather other supplies needed: cyanotype chemicals, a paintbrush or foam brush, a dish for holding the mixed chemicals, optional: newspaper, apron.
Prepare an area away from direct sunlight (preferably dim lighting) to begin coating your paper. Consider that the cyanotype chemicals may splatter a bit. Covering you workspace with newspaper or wearing an apron might be helpful to avoid issues.
Mix the chemicals together in a dish according to the instructions on the package.
Dip your paintbrush/foam brush into the chemicals and coat paper in nice even strokes. At this point you can consider if you want the chemicals to go all the way to the edge or only cover a portion of the paper. No need to soak the paper. Just get a good coating in all the areas you want to print.
Leave the coated paper to air dry in the dark. Any sunlight that might come in contact with the paper will start the exposing process. So darkness is necessary until you are ready to print.
Once your paper is dry, gather materials for printing (coated dry paper, plants or stencil, frame with glass larger than your paper, timer/clock, container with cool water, towels, optional: tweezers, hydrogen peroxide, spring clamps)
Prepare a container larger than your paper with cool water. You will only need enough water to dip your paper and move it around in. Adding a smidge of hydrogen peroxide to the water quickens the development process, but is not necessary.
Lay frame backing on your workspace and place the coated cyanotype papers on top. Depending on the size of the frame/backing, you may be able to make several prints at once.
Place your printing materials (plants/stencil) on the paper in a design/layout you like. Using a pair of tweezers can help with placing tiny or delicate objects.
Lay the glass from the frame on top of backing, paper, and your objects to hold them all together like a sandwich.
Place the frame over the glass, flip it over, and secure the backing. Note: This step is optional as you can just use the weight of the glass to hold down your items. It might be helpful to put some tape over the edges of the glass to prevent any injuries. Some frames come with plexiglass. This can work just fine as long as it’s heavy enough to hold everything down. Be aware that plexiglass can cause static electricity with your items on the paper and cause them to move. Otherwise, I’d suggest definitely using the frame to hold it together. Spring clamps are also handy if you don’t want to use the frame.
Take your frame sandwich outside and lay it in direct sunlight.
The amount of time to leave it out in the sun depends on many factors such as the time of day and intensity of the UV light. When fully exposed, the paper will turn a silvery color. 10 minutes is a great place to start on sunny day or 20 minutes for a cloudy day. You can adjust for other prints if it’s not the desired blue. In my experience, overexposing doesn’t change the outcome too much depending on the types of plants used. But underexposure will result in a lighter blue. Making a test strip can help with narrowing down the timing.
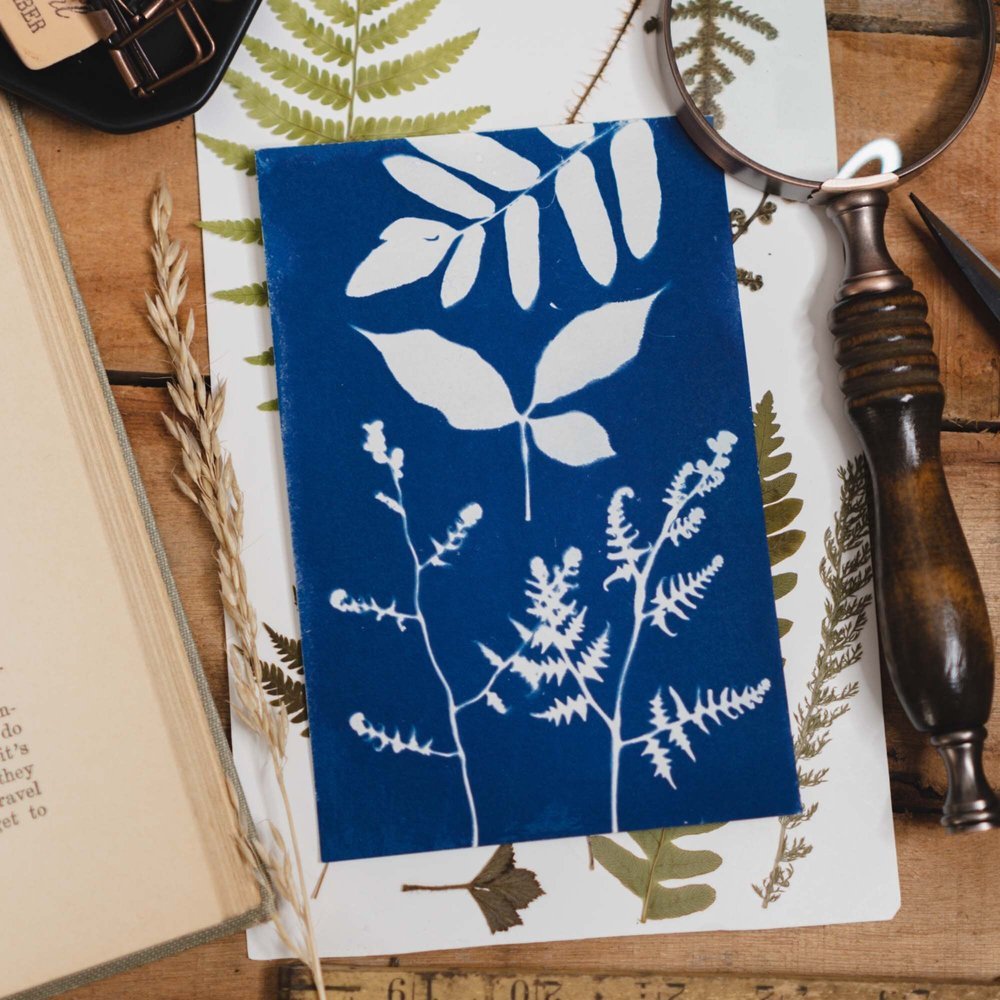
Once the timer has elapsed, remove your print and take off your items. Take your print over to the container of water and place it inside. Swish the paper around side to side for a few minutes. The part of the paper that was covered by your objects will have the solution wash away. It will be yellowish at first and then change to white (or the color of your paper).
Lay your finished print on a towel. Blot the paper with another towel to remove any excess water.
Let print to dry.
Over the next 24 hours, the blue of the paper will deepen and be finished. If you used peroxide in your water bath, the blue will have been set immediately after rinsing.


